 So two years ago Erik NEEDED me to plant black seedless grapes .Yes I said NEEDED. like the ones we ate in France many years ago. Yup I will get right on that one. Don't even try to get these from a local grower. It wont happen.
So I searched the Internet. I finally found a grower on Amazon willing to ship grape plants to California.He was from Texas so I gave it a shot. All I can say is they were not cheap. When I got my 3 plants shipped in an 8x10 envelope my heart sank. They were 3 grape stems with a few small roots at the end. Yeah right. I should have known better. But my husband NEEDED black seedless grapes.
They were called Mars Blue Seedless grapes. and I kind of giggled when I put my sticks in the ground. I must have watered my sticks for 3 months when finally a small bit of green arrived. I now have 3 very large grape vines dripping with Mars Blue Seedless grapes . Unfortunately with this heat I had lots of shriveled raisins. Some however have survived. At the beginning of this latest heat wave I picked some that were not quite ripe . So glad I did.
The real clincher was I got to use my immersion blender !!! My daughter bought it for me a few years ago and I use it ALL the time. The best part of this was that my blender caught all the tough skins and it was sooo easy to remove them.
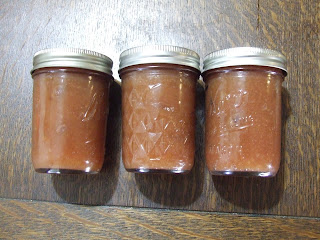
This really was the best jam I have ever made. It took at least an hour to cook and it set up really nice. Due to the unripened grapes it also had a bit of a tang to it. Not too sweet like most jams.
I am considering trying to propagate some in the fall. Maybe I can bring some plants to a trade if any one is interested. I will definitely post my results!!!
Grape Jam
If you don't have an immersion blender, you can add the ingredients to a food processor to blend, then add to your pot.
Ingredients
4 pounds seedless grapes
3 cups sugar
3 tbs fresh lemon juice
Instructions
1. Prepare your canning jars
2. Add grapes, sugar and lemon juice into a large pot
3. Over a med heat, stir to combine
4. Insert immersion blender below surface and blend to desired consistancy
5. Stir often, skimming off foam when need be
6. Boil until mixture reaches 220° and/or passes the freezer test
7. Ladle jam into jars, leaving 1/4" headspace
8. Wipe off rims with a clean damp cloth
9. Top with lids and process for 10 minutes
10. Transfer to towels to cool
11. Label and date
Notes Remember that the jam will thicken more as they cool


